Dense with vegetation

There’s a new quilt on my design wall this week. I started it a while back, but decided to abandon it until I got the Sweet16 up and running. After finishing the Carolina Parakeets, I believe I’m ready for this one now. I estimate that it will have a finished size somewhere arouswamp landnd 40″ x 60″.
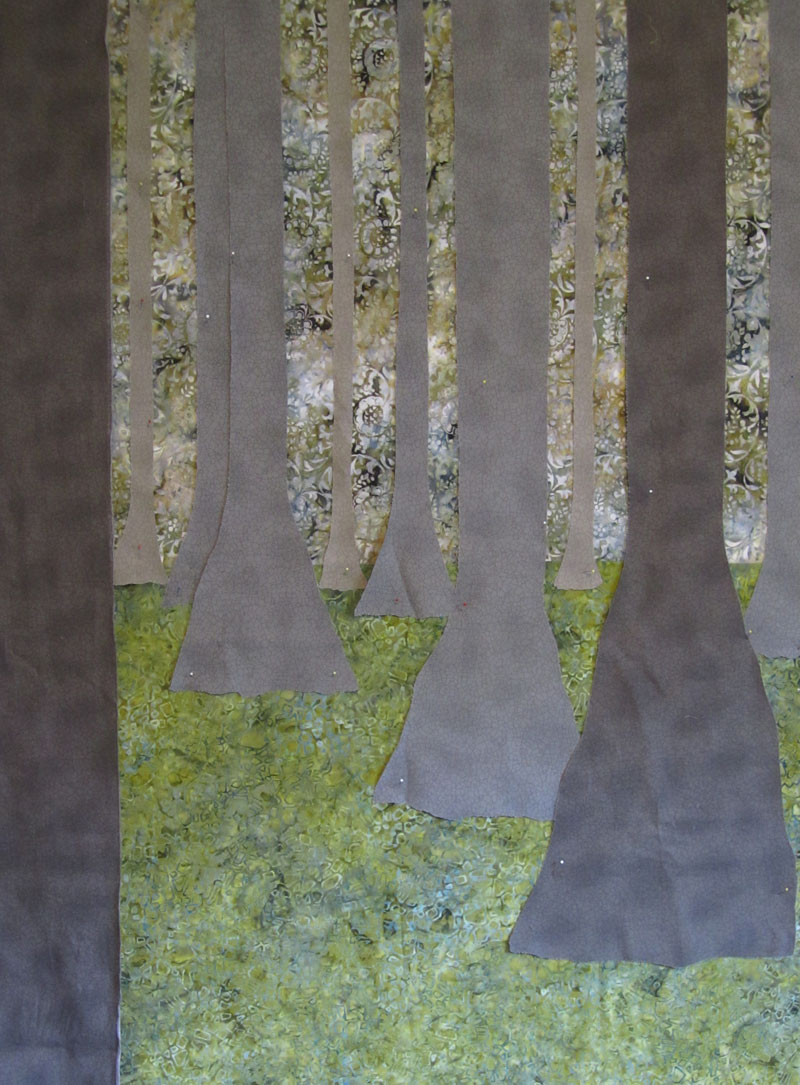
All the fabric trees have been cut and ready to fuse to the background. After the trees are in place, I’m adding depth and 3-D shading using tulle (aka bridal veil), a trick I learned early in my quilting career.

I used to work full-time as a freelance technical editor. A lot of the tools I have in my “tool box” were gleaned from editing other people’s books. The very first book I edited was Joyce Becker’s Beautifully Embellished Landscapes. During the editing process, I had to read through Joyce’s book several times. With that much review, stuff is bound to stick in your head.

Tulle is a wonderful medium to create transparent shading effects on fabric. If you need to make something in your landscape look darker (or lighter) , just sew a layer of dark (or light) colored tulle on top of the fabric. That’s what I need to do next; I only have 3 shades of tree fabric and need to add some dimension to the scene.

In real life, the color value of a landscape scene gets lighter the farther it is from you. For example, when you see mountains, the peaks farthest away from you are usually lighter (smokey looking) compared to those in the foreground. When you’re looking at a landscape in real life, it’s the light from the sky and sun that creates this faded coloration. On the other hand, when you’re in the midst of a dense forest, the vegetation adds shadows and darkens the background. So do I want my forest to have light coming from the horizon or appear dense with vegetation?
5 ft-wide Wingspan

The parakeets are coming along nicely. All the thread work and quilting was accomplished using my HandiQuilter Sweet16 sewing machine. I am so grateful for having been awarded the grant to purchase this machine. I really has made creating large quilts so much easier.

osprey wingI’ve debated about posting a final picture of the parakeets here. I’ll probably do that eventually, but most likely closer to my November show at the Arts Council. I’m pretty proud of what I’ve done on this one. But, unfortunately, you’ll have to wait a little bit for the reveal.

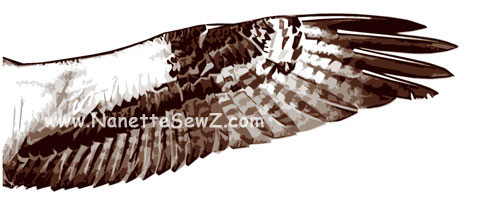
As soon as the “keets” are done, I’ll be on to the next pieces. One was inspired by a photograph taken of an osprey by my friend, Brady. Brady is a phenomenal wildlife photographer. He provided the inspiration for my “Fireline” quilt I made a few years ago.

For “Fireline”, Brady had the photo and I rendered it in fabric. This time, I had the idea and asked Brady if he had a photo that would help me accomplish my idea. I’m so happy to be working with his imagery again…can you imagine a 5-foot wide wingspan?

Making Progress

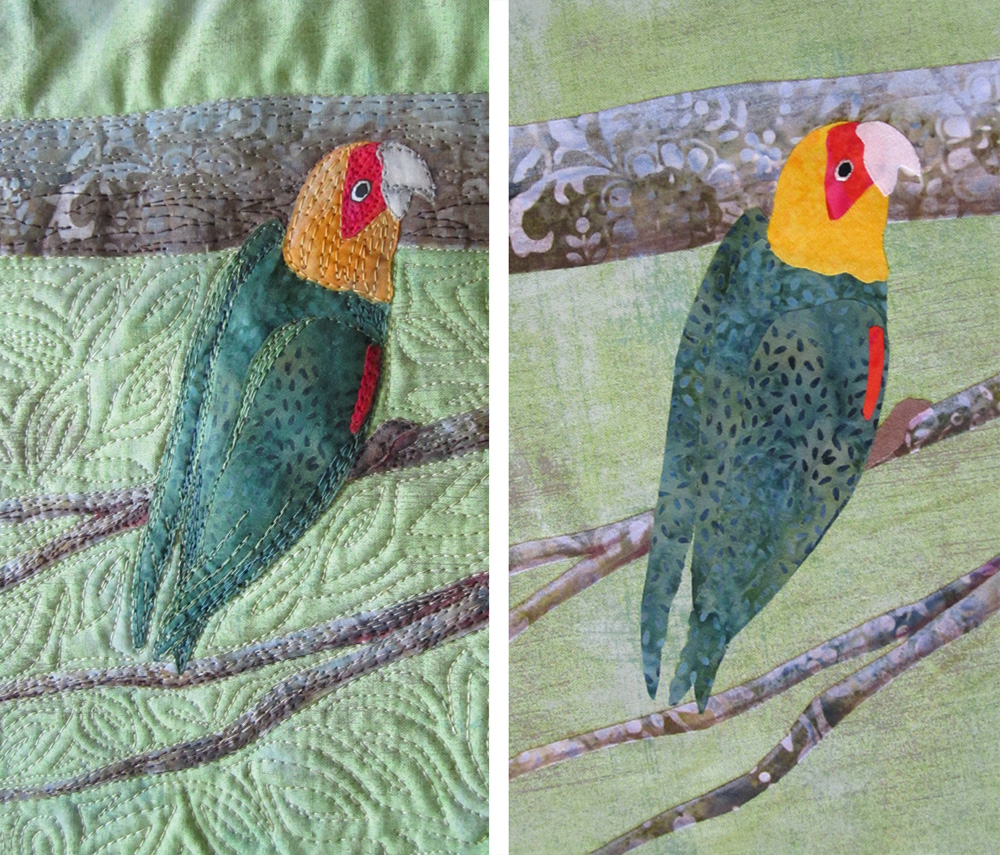
IParaleet progress‘m still trying to make progress on the Carolina Parakeet piece. Unfortunately, I’ve had some interference with my time, but I’m doing my best to keep focused. I thought for sure this quilt would be done right now. So close…yet far enough away that I feel a bit frustrated.

I was talking to a friend this morning and reminded her that she was indeed making progress on something she was working on. The progress was just taking longer than she expected. —Ah, just another validation that talking out loud sometimes solidifies your own thoughts. — I too must remember I am making progress.

I’m happy where this is art quilt is going. I’m sharing a comparison photo that clearly shows I’m getting somewhere. The birds and branches are all detailed and I’m working on filling in the background with quilting. This is taking time, however…

The good news is that I’m creating dense quilting. Something I’ve wanted to do in the past, but just struggled doing on my domestic sewing machine. My Sweet16 sewing machine, with its sweet 16″ neck opeing, is making my work so much easier. I can sew and sew and sew and sew without having to re-adjust the bulky quilt so frequently. Makes me very happy.

The bad news is I’ve developed a muscular strain in my back and neck which is causing me great discomfort sitting. I’m working on resolving the issue, but I’m still limited to just short runs at the machine. Again, the key is patience, I am making progress.

Are you listening?

Sometimes talking to people about your plans and goals helps solidify them. It’s easy to think about what you want to do; dream a little. But, I often find that I don’t feel solid about my plans. Should I really be doing this or that? It’s difficult to place a finger on the right answer. Carolina ParakeetThen, I talk to someone about it all. I say the words out loud and it’s like, Bam!, “why the heck didn’t I see that?” I know what I was thinking, but it didn’t seem like solid advice until I said it out loud.

I have a few friends that get me thinking like this. When we have our talk therapy sessions, they ask just the right questions which force me to give them a self-motivating answer. They’re not telling me what to do, however, by answering their question I have to stop, think and rationalize my response. My answer forces me to be accountable, because the response isn’t just in my head anymore…it’s been expressed in the spoken word. I’ve placed it into the universe for others to see.

Last week I was faced with this situation. My friend asked, “what are you trying to get from traveling this path as an artist?” or in other words, “why am I pursing being an artist?”

I’m sure, depending on the person, this questions could be answered in many different ways. I know I like making art; I always have. I don’t really expect to get rich selling my work. I feel the need to make it, but why? I surely have thought about it before, but no one ever really asked me before. “Why are you doing this?”

I could have taken a lot of time to ponder the question, but what surprised me was how quickly I answered. I told her “I want to be heard.” The answer bubbled out of me in a way that took my breath away. That’s it! I have something to say. My artwork is no longer art for art’s sake, there are messages behind it.

As I am working in my studio, preparing for the November exhibit, I have stories in my head. I visualize these narratives and take time to render the image using cloth.  This is what drives me to continue, I want to share stories with you…are you listening?


Stay tuned

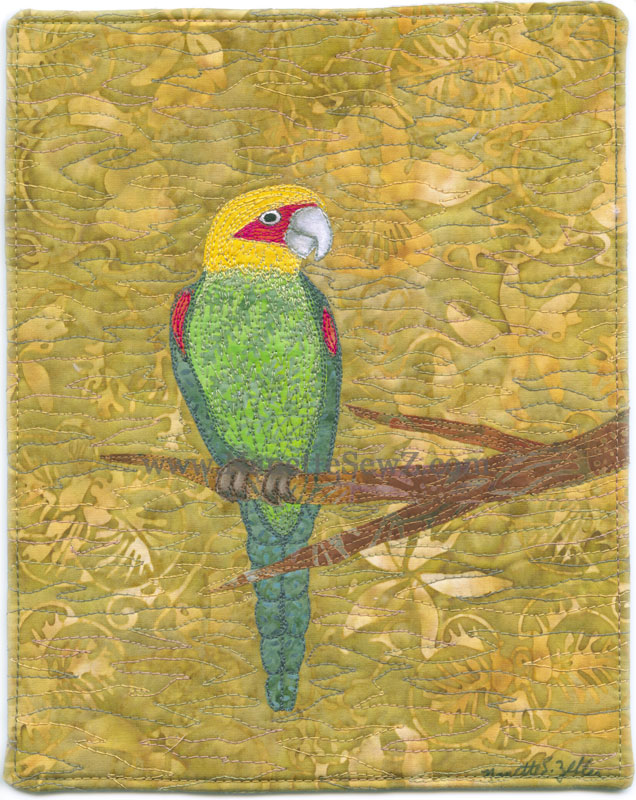
Carolina ParakeetLast week I mentioned that I had been working on a few pieces that were experimental play, where I could focus on a specific technique and work out the bugs.  I have another one to show you.

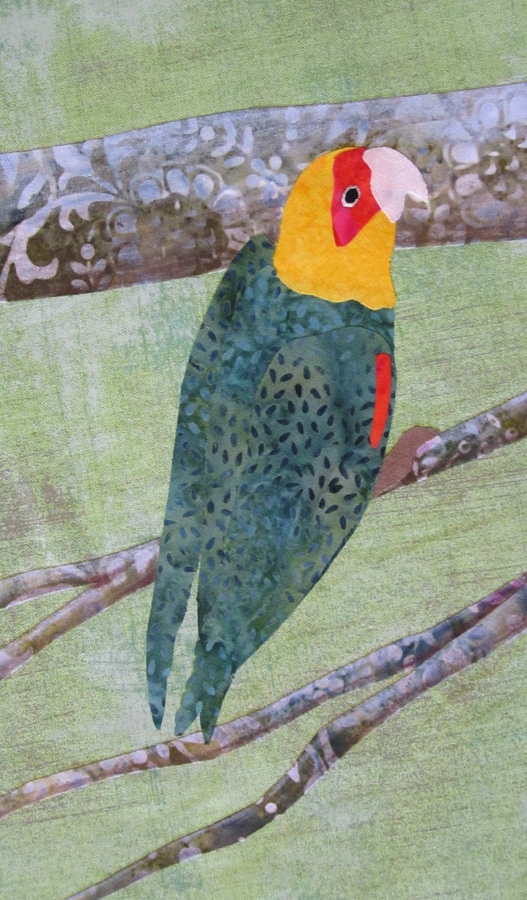
Awhile back, I posted sketches for a quilt I was planning to make (see the story here). I took the sketches and used them as templates to make fabric birds. Although the fabric birds have been done for awhile, I was hesitant to move forward with my idea. I have never thread painted birds and I wasn’t sure how that would work out. If I composed the design on a large (finished-sized) background and then did my thread work, I would be in a world of hurt if I messed things up (that dreaded point of no return again). I was intimidated to move forward until I finally figured out how to get past this hurdle. Then I got an idea…

I am involved in a monthly mixed-media art exchange with 10 other artists. The intent is for each of us to create a book of artwork. We each submitted guidelines on what we wanted for our books, e.g., theme and page size/orientation. The challenge coordinator gave us a schedule of who we will be creating a book page for each month. Then, every month for ten months, I create a piece for someone and someone creates a piece for me. It’s fun!

For May, my artist had a theme of “birds,” size 8″x10″, and vertical orientation. Ah-Ha! Since my birds were the right size,  I could test my thread painting technique on Leni’s page. Yep, I used this small quilt to help me gain confidence to proceed with the larger quilt.

I am pleased with the results. Currently, I’m auditioning backgrounds for the large quilt where 7 happy Carolina Parakeets will be hanging out. Things won’t be exactly the same on the larger quilt, but testing the technique allowed me to know what will and won’t work on a larger scale. Stay tuned…


It’s a win-win process

I’m trying to get into the swing of things. In some respects, it seems like I’m just playing around. Tcrepe myrtleshe last couple of weeks I’ve been working on smaller pieces that had other purposes. I have to keep reminding myself that I’m not wasting time.

A friend of mine told me how she always made a smaller version of her work before she tackled the bigger quilts. For most of my projects, the components can get very small, even on a large scale art quilt. I couldn’t imagine rendering the image down smaller than they already are. The pieces would just be too teeny to work with.

The pieces I’ve “played” with the last couple weeks are like technique snapshots. I am experimenting with different techniques to see how the process would work on a larger scale. Happily, I have had several “ah-ha” moments.

It’s always kind of scary to make art using cloth. In the early stages of development, you can rip things out and start over. But, as you add more and more layers of fabrics and thread, the point of no return becomes really obvious. Painters can scrap an entire canvas by slapping a coat of gesso on it, then start over. Textile artists don’t have that luxury, the materials are usually lost. If we’re lucky they can be re-purposed, but frequently they’re only worthy of the trash. Starting over is also risky because you may not have any more of the precious “sky” fabric that worked so well the first round. We must do every thing we can to avoid disaster, because there’s no going back.

That’s why, testing out a technique is important. If I can get a technique down on a small project, it makes my attempts on the big project more likely to succeed.

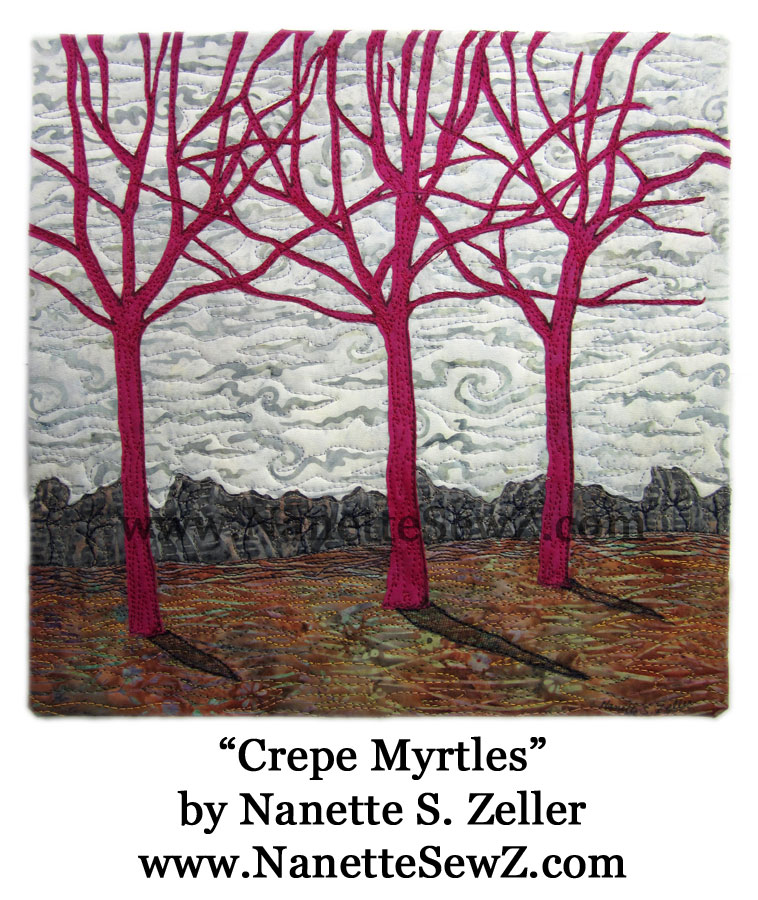
Last week, I explained one experiment I had with the Cameo Silhouette. While working through that process, I created a piece called “Crepe Myrtles” (click here to read about the process).  I sent it to SAQA (Studio Art Quilt Associates — www.saqa.com ) this week to use for their annual benefit auction (fyi- you’ll be able to bid on it this fall). You see, I wasn’t wasting time. I was learning and exercising my creative muscles. And in the end, it’s a win-win process for me, SAQA and maybe you if you plan to bid on it.

Tools in my toolbox

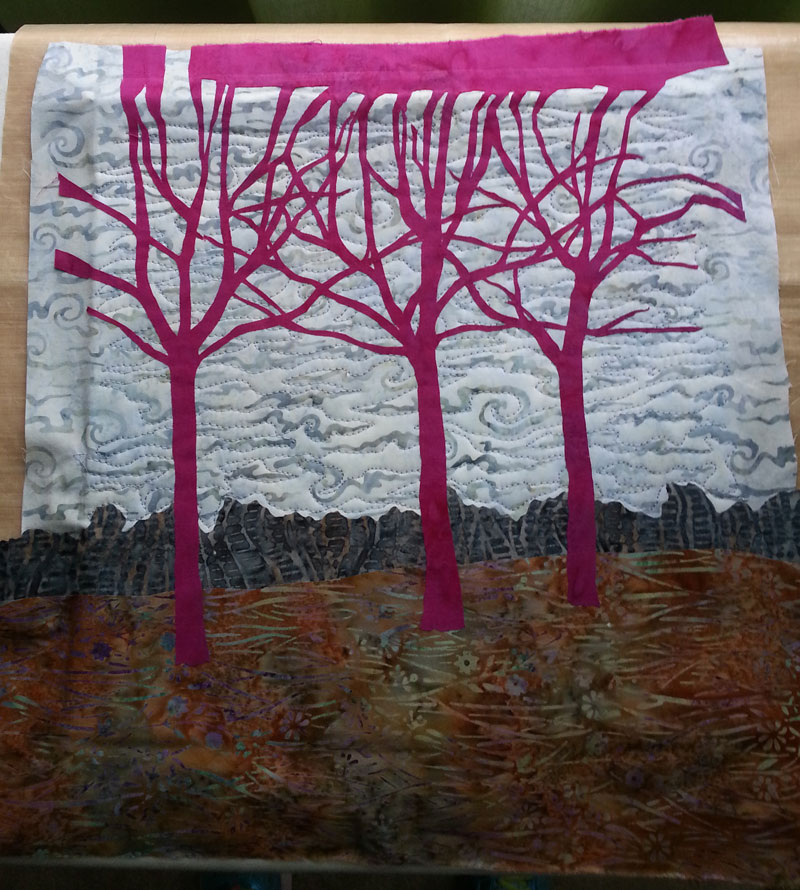
silhouetteLast year I was working on an art quilt that required a lot of intricate cutting (you can see it on my home page – www.nanettesewz.com ). I couldn’t find scissors sharp enough to make the tiny cuts, so it took a long time to remove all the unwanted fabric. Before I could even cut the fabric, I had to draw the design onto paper and then trace it to my cloth. Tedious, to say the least. I was talking (actually kind of whining about it) to the owner at my LQS and he told me about the Cameo Silhouette.

The Silhouette is a plotter similar to what engineers use, but a home version made for crafters. It allows me to send a line drawing from my computer into the plotter.  From there the machine can “draw” the lines for me. The lines can be made using a variety of tools from pens, embossers, or cutting blades. I bought the machine for its cutting possibilities.silhouette_trio

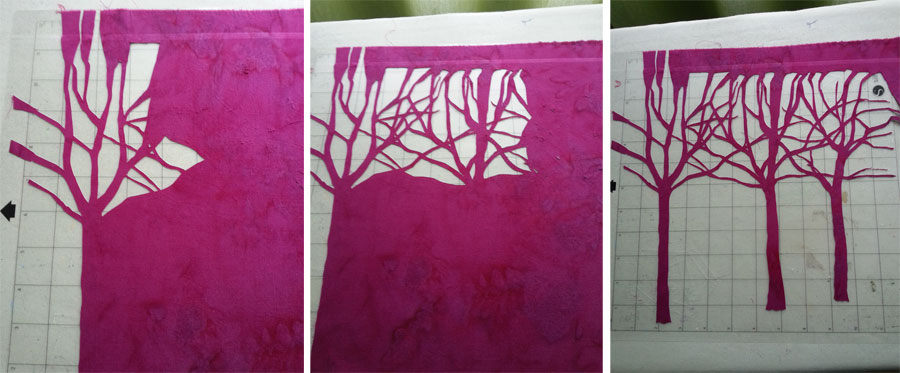
myrtletrioMy first attempts at cutting didn’t go well and I was quite frustrated. I knew I needed a significant amount of time to figure things out, but couldn’t find the time to devote to it. Over a year after buying the machine, I found time this week. Following a couple of hours of fiddling with the computer software, my fabric and cutting blades, I finally figured out my major issues: 1) use the correct fusible stabilizer and 2) use a sharp cutting blade!!! Magic!

Just to prove the point that it would work for me, I’m remaking the quilt that got me started on this mission. In the photos you’ll see the tiny little cuts that were made by my Silhouette as it outlined the lines of my tree branch drawing onto my batik fabric. When the machine was finished tracing the lines using the cutting blade, all I had to do was remove the unwanted pieces of fabric. Amazing! I’m pretty excited about this. Just one more tool in my toolbox.

This New Quilt

Well hello there 2016!

Sometimes it’s unbelievable how time flies. Occasionally, I’m reminded of things that happened in the past and I’m frequently baffled how long ago that event happened. I guess that’s what happens when you get older. Time flies faster.

At the beginning of the year, I try to come up with new goals. Not really resolutions, but just ideas of things I want to accomplish. My biggest goal this year is to create enough artwork for the exhibit I’m in this coming November. I have some pieces, but I need quite a bit more.

The entire concept of creating enough to fill a gallery is a bit intimidating. Its also very inspiring. I have a ton of ideas buzzing in my head. Some things are similar to what I’ve done in the past, but I’m also thinking about some innovative ideas like 3-dimensional construction. This could get interesting.

The last 2 months I was working on a large piece and decided that it would be better left for when I own my new mid-arm machine. The new machine can handle the bulk of a larger quilt better than the machine I currently have. I’ve placed this large quilt on temporary hold and am working on ideas for smaller quilts.

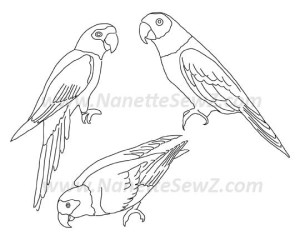
The last few days I’ve been creating outline drawings for my next piece. I’ll use the drawings as templates to render my little feathered friends in fabric. I could just hand draw the images, but I like to create them in Adobe Illustrator. It takes a bit of effort to get them into the program, but I find the end results easier to use. I can take a couple of base images and alter them easily in Illustrator. If the originals don’t work, a little tweak here or there and I have an entirely new character. This is helpful when I’m making a piece with multiple components of the same thing.  Working for over a decade as a web/graphic designer has offered me the tools and confidence to work this way. Without the aid of the computer, I would be drawing and re-drawing my images to get the look that I want. That’s just not something I’m excited about doing.

I have ideas for several bird quilts I want to make this year, but this will be my first attempt creating them.  We’ll see how this one turns out. The end result might alter my ambition for the year, fingers crossed it works out as well as I envision.

By the way, I’m curious, when you look at my line drawings, can you tell what specific bird species I’m featuring in this new quilt?